This is one of a series of articles that will describe how to set up and use various Japanese woodworking tools in an effort to show you how they work and how you might be able to include them in your own workshop. If you already own some of the tools included in these articles, then you may find new ways in which you can use them.
When it comes to Japanese tools, there is rarely one ‘right’ way to make them work. While it is often said that you must use xyz tool in a particular, proscribed manner it is more likely a case of that way being one of several ways to use the tool. This is not a hard and fast rule, and if you find that you wish to use a tool in a way that ‘goes against the grain’, then you should go ahead and do it, provided that the method is safe and will not harm the tool.
Without further ado…
Replacing hook style saw blades.
The ‘hook’ method of fixing a replaceable blade to a handle is largely dominated by Z Saw, who happened to patent this particular method. Since the patent has now expired, there are several manufacturers offering this style of handle/blade connection.
Why?
One simple, elegant reason more than any other, replacing the blade requires no tools which is a useful feature. The connection is also simple, light in weight and very secure.
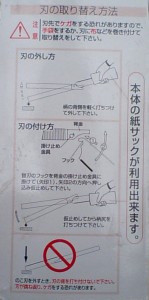
If you happen to own one of these saws, then you will no doubt have seen that on the sleeve it demonstrates how to change the blade by using a cloth to cover the teeth and tapping the handle on a solid surface to dislodge the blade.
Is it just me, or does that make a mockery of the ‘no tools required’ benefit of this handle style? Not to mention that the teeth on a new blade are razor sharp and it is possible for them cut the cloth like, well, a razor!
I’m not so sure I want a hand full of razor sharp teeth when I am busy trying to smack the handle like a hammer into something solid.
Henceforth, here is a SAFE method of changing the blades not requiring a cloth, nor that you even come close to touching the teeth.
Step one: removing the blade.
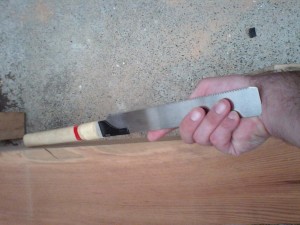
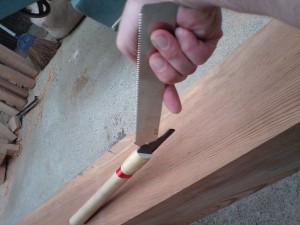
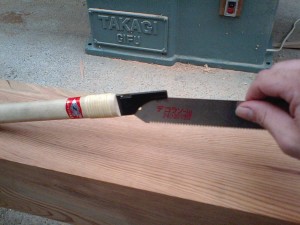
The trick here is to grasp the blade from the side with no teeth on it.
Like this.
If you keep all flesh away from the teeth, you will keep all your flesh!
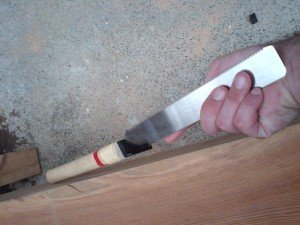
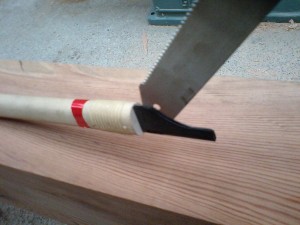
To remove, sharply tap the handle against something solid, allowing the blade and handle to hinge around the large ‘pin’ that resides inside the steel handle insert. The direction in which to tap the handle is with the closed side of the insert toward your solid object.
I am using a large cedar beam here.
Sharp taps will do the job, soft taps won’t accomplish very much. Heavy bashes will send the handle flying, so short, sharp taps are the order of the day.
And there you have it! The blade is no longer solidly attached to the handle, and will simply swing away allowing you to replace the worn blade with a nice, fresh blade.
Step 2; inserting a new blade.
Inserting a new blade is largely a reverse of the removal. You hold the blade in the same way, but you tap the handle against your solid object in a different direction, that being with the open side of the insert facing your solid object.
The trick here is getting the handle and blade to remain together until the crimping action of the steel insert begins to hold the blade.
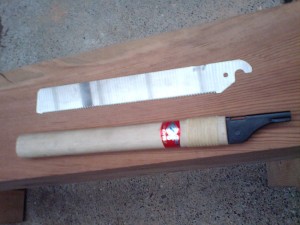
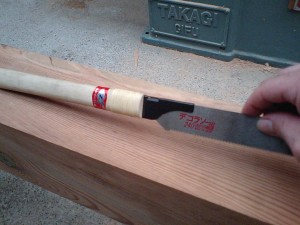
Start with the blade loose in the insert, as shown.
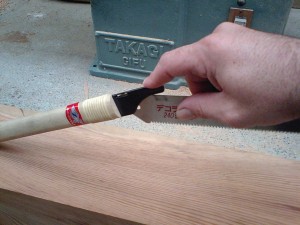
Then using your index finger, press down on the insert with enough pressure to prevent the blade and insert rotating. With lightweight wood handles, the amount of pressure is slight. With the heavier, rubber blade aluminium handles you will need to apply more pressure, but this should be possible by anyone with enough strength to successfully use the saw.
Once you are confident you have a sure grasp on the situation, a light tap with the open side of the insert toward your solid object should be enough to get the blade started into the insert and prevent the handle and blade moving relative to each other.
A few more sharp taps and the job is done, all in relative safety and with nothing more than a fresh blade and a single hand required.
Back to square one.
Conclusion.
This is a very easy and safe operation, and I cannot say why it is not proscribed by Z Saw (and others) as the correct method. It can even be done safely with one hand tied behind your back.
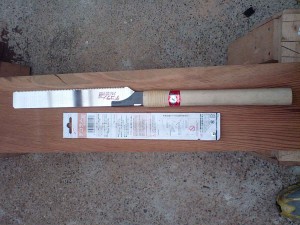
In this essay, I used what is known as a ‘Decora Saw’ which is a small, simple and very cheap saw designed to be abused to death. It uses standard cross cut teeth on a shallow 0.60mm saw plate and is rated for all construction materials, as well as solid wood and synthetic marble (corian).
As supplied, it is a very handy saw for general cutting work.
With some of the tooth set removed by a few swipes on a sharpening stone, it becomes one of the finest joinery saws available.
Currently it is not listed in the store, and oversight that will be very soon corrected.
It goes without saying that this method will not work for saws that have a long spine to help keep the blade straight and true. These saws have a steel spine that extends almost the full length of the blade, stopping short by just enough to allow you to tap the blade directly to assist in replacement.
I hope this will prove helpful to you who own saw with hook style blades, and if it saves even one drop of blood, it has been worth the effort.
Thanks for reading.
Until next time…
Stu.
Good Blog Post…
Have a look at this Post on this Blog…